How to generate a quote from Attio with Google Docs and DocuPotion (data model, CPQ, line items, ...
I’ve been doing a bit of digging on the various ways you can generate a quote direct from Attio. There are a few native apps that allow you to kinda of do this, while other Attio users have suggested building a workflow that connects to QuickBooks or similar tools via Zapier.
Disclaimer: I’m the founder of DocuPotion - a document generation / e-signature app for Attio
I’ve had a couple of Attio users ask me how they can use DocuPotion to generate a quote for a Deal record and I realised there’s, somewhat surprisingly, quite a lot involved in generating a simple PDF of a quote from Attio.
Here are some notes on the approach I landed on.
End result
User can generate a PDF of a quote, with multiple line items, using data from the relevant records without leaving Attio
The quote gets sent to the customer for signing
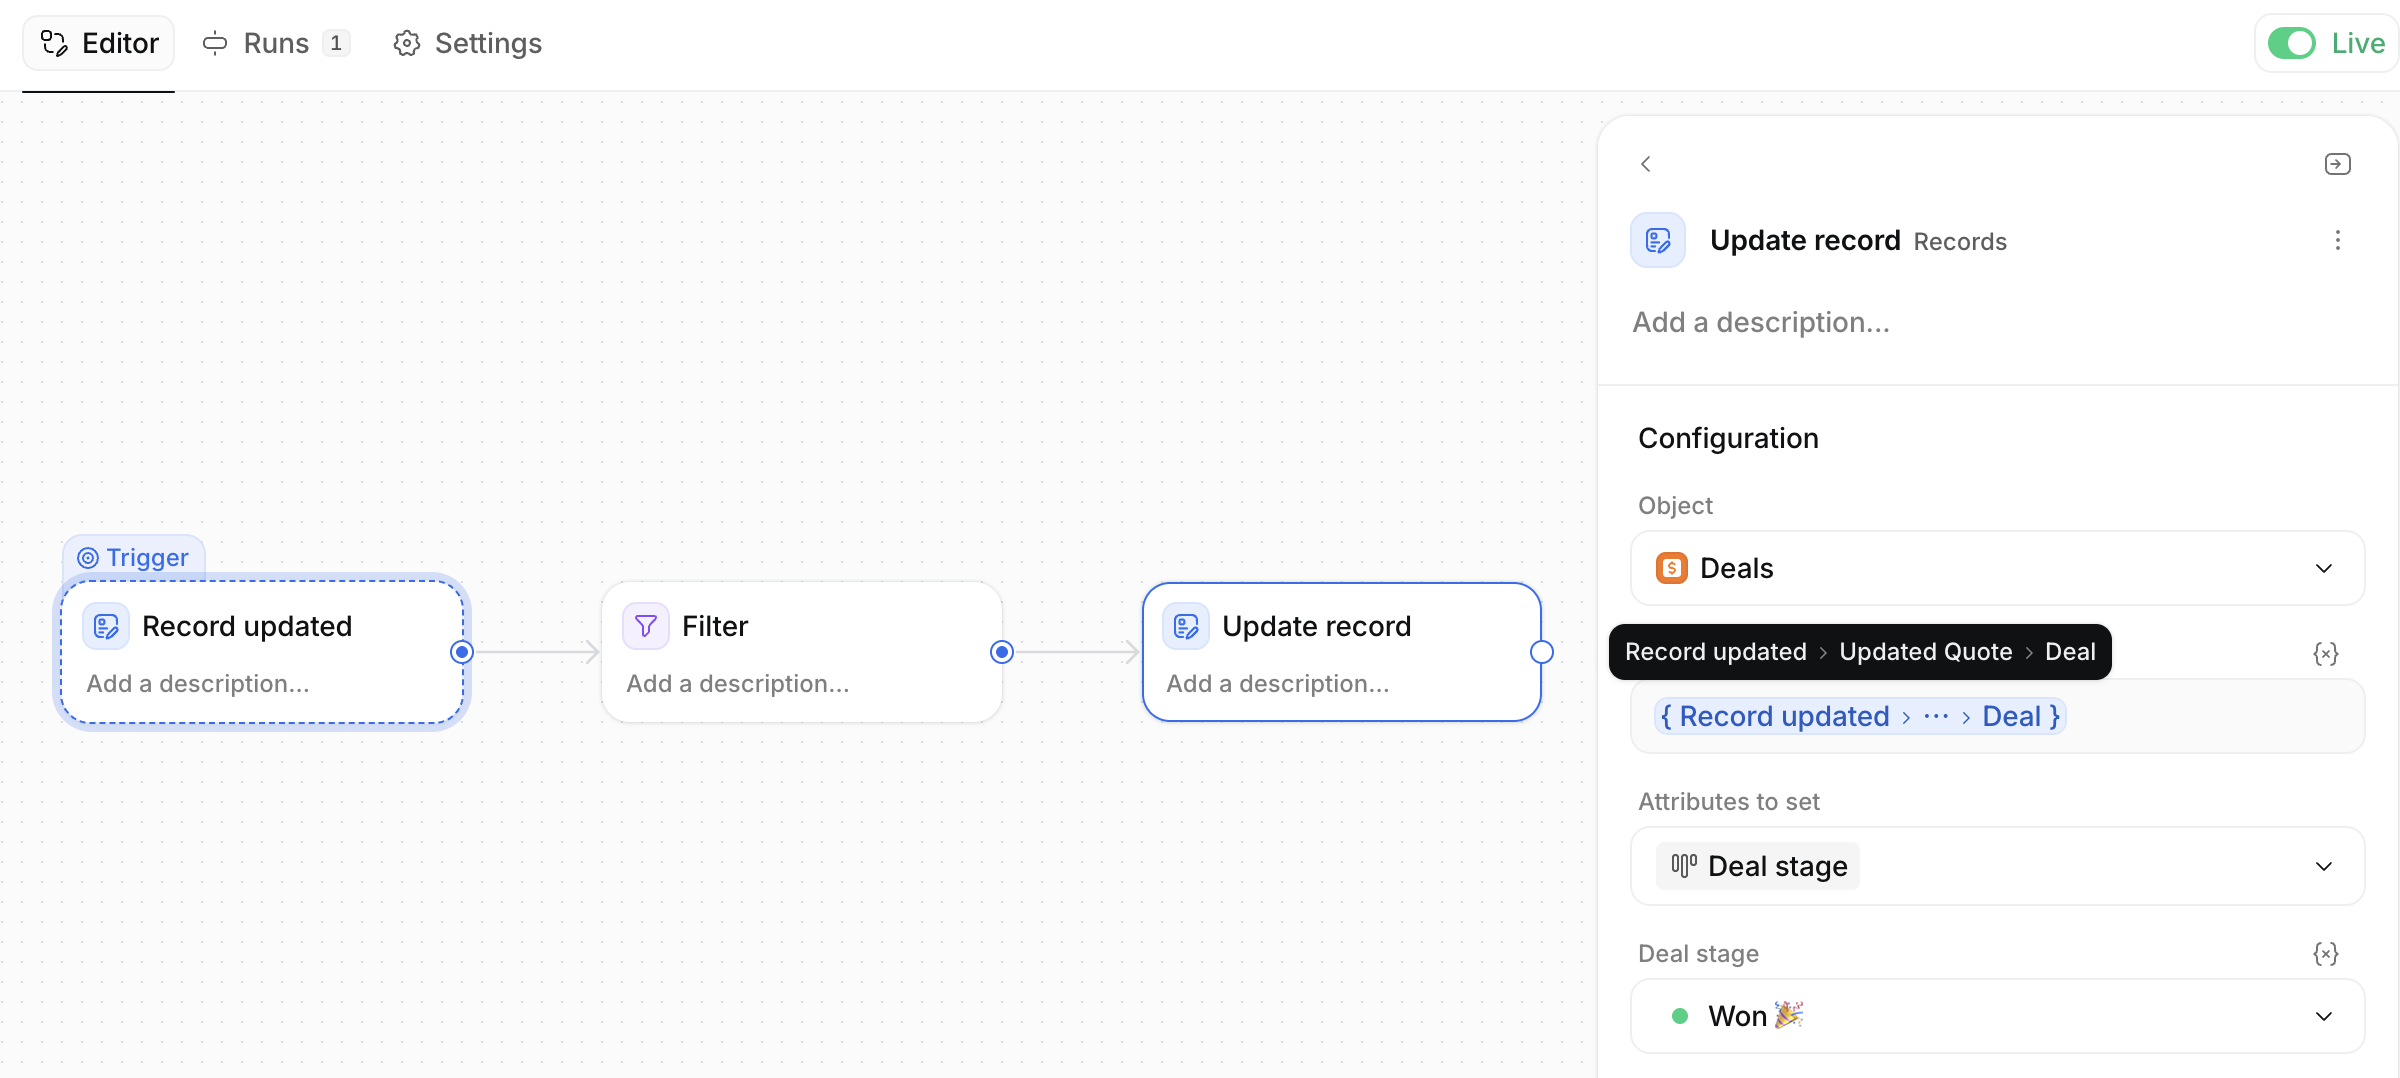
Once signed, the Deal associated with the Quote is automatically updated (via an Attio workflow)
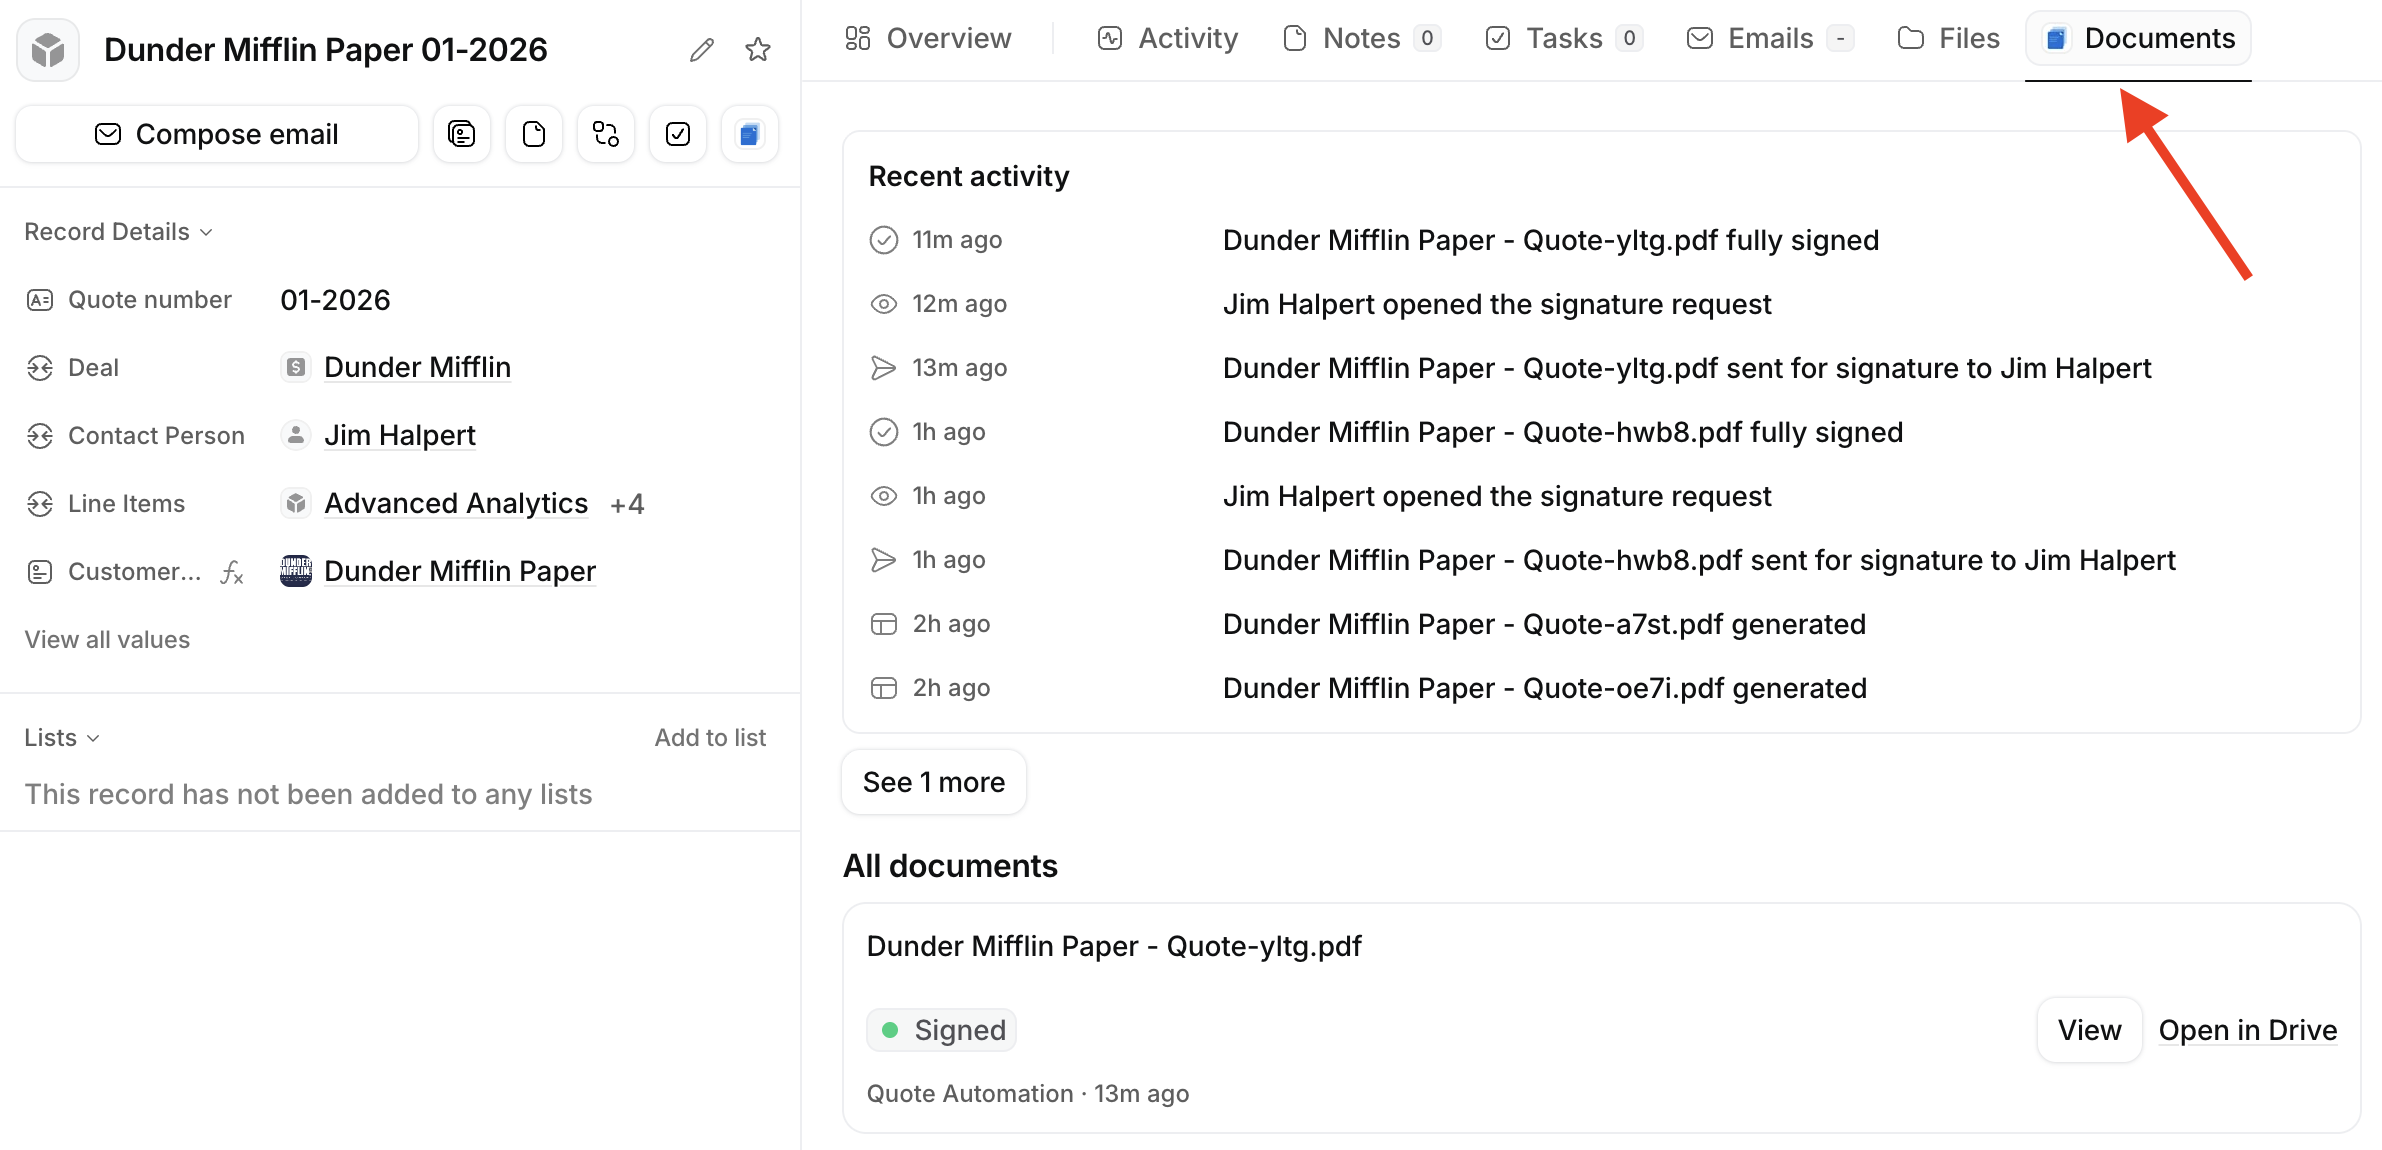
All document statuses are tracked (sent for signature, signature request opened, fully signed)
This may be slightly more complex than some workspaces need. If you don’t need the e-signature part, then #1 will cover you.
Here’s a quick video showing the entire workflow in 70 seconds:
Data model
You could add a bunch of attributes to the Deal record (EG quote number, due date) for the info that’s going to go into the quote. But I don’t love the idea. You’ll quickly end up with a lot additional of attributes and it doesn’t work if you need multiple quotes per deal.
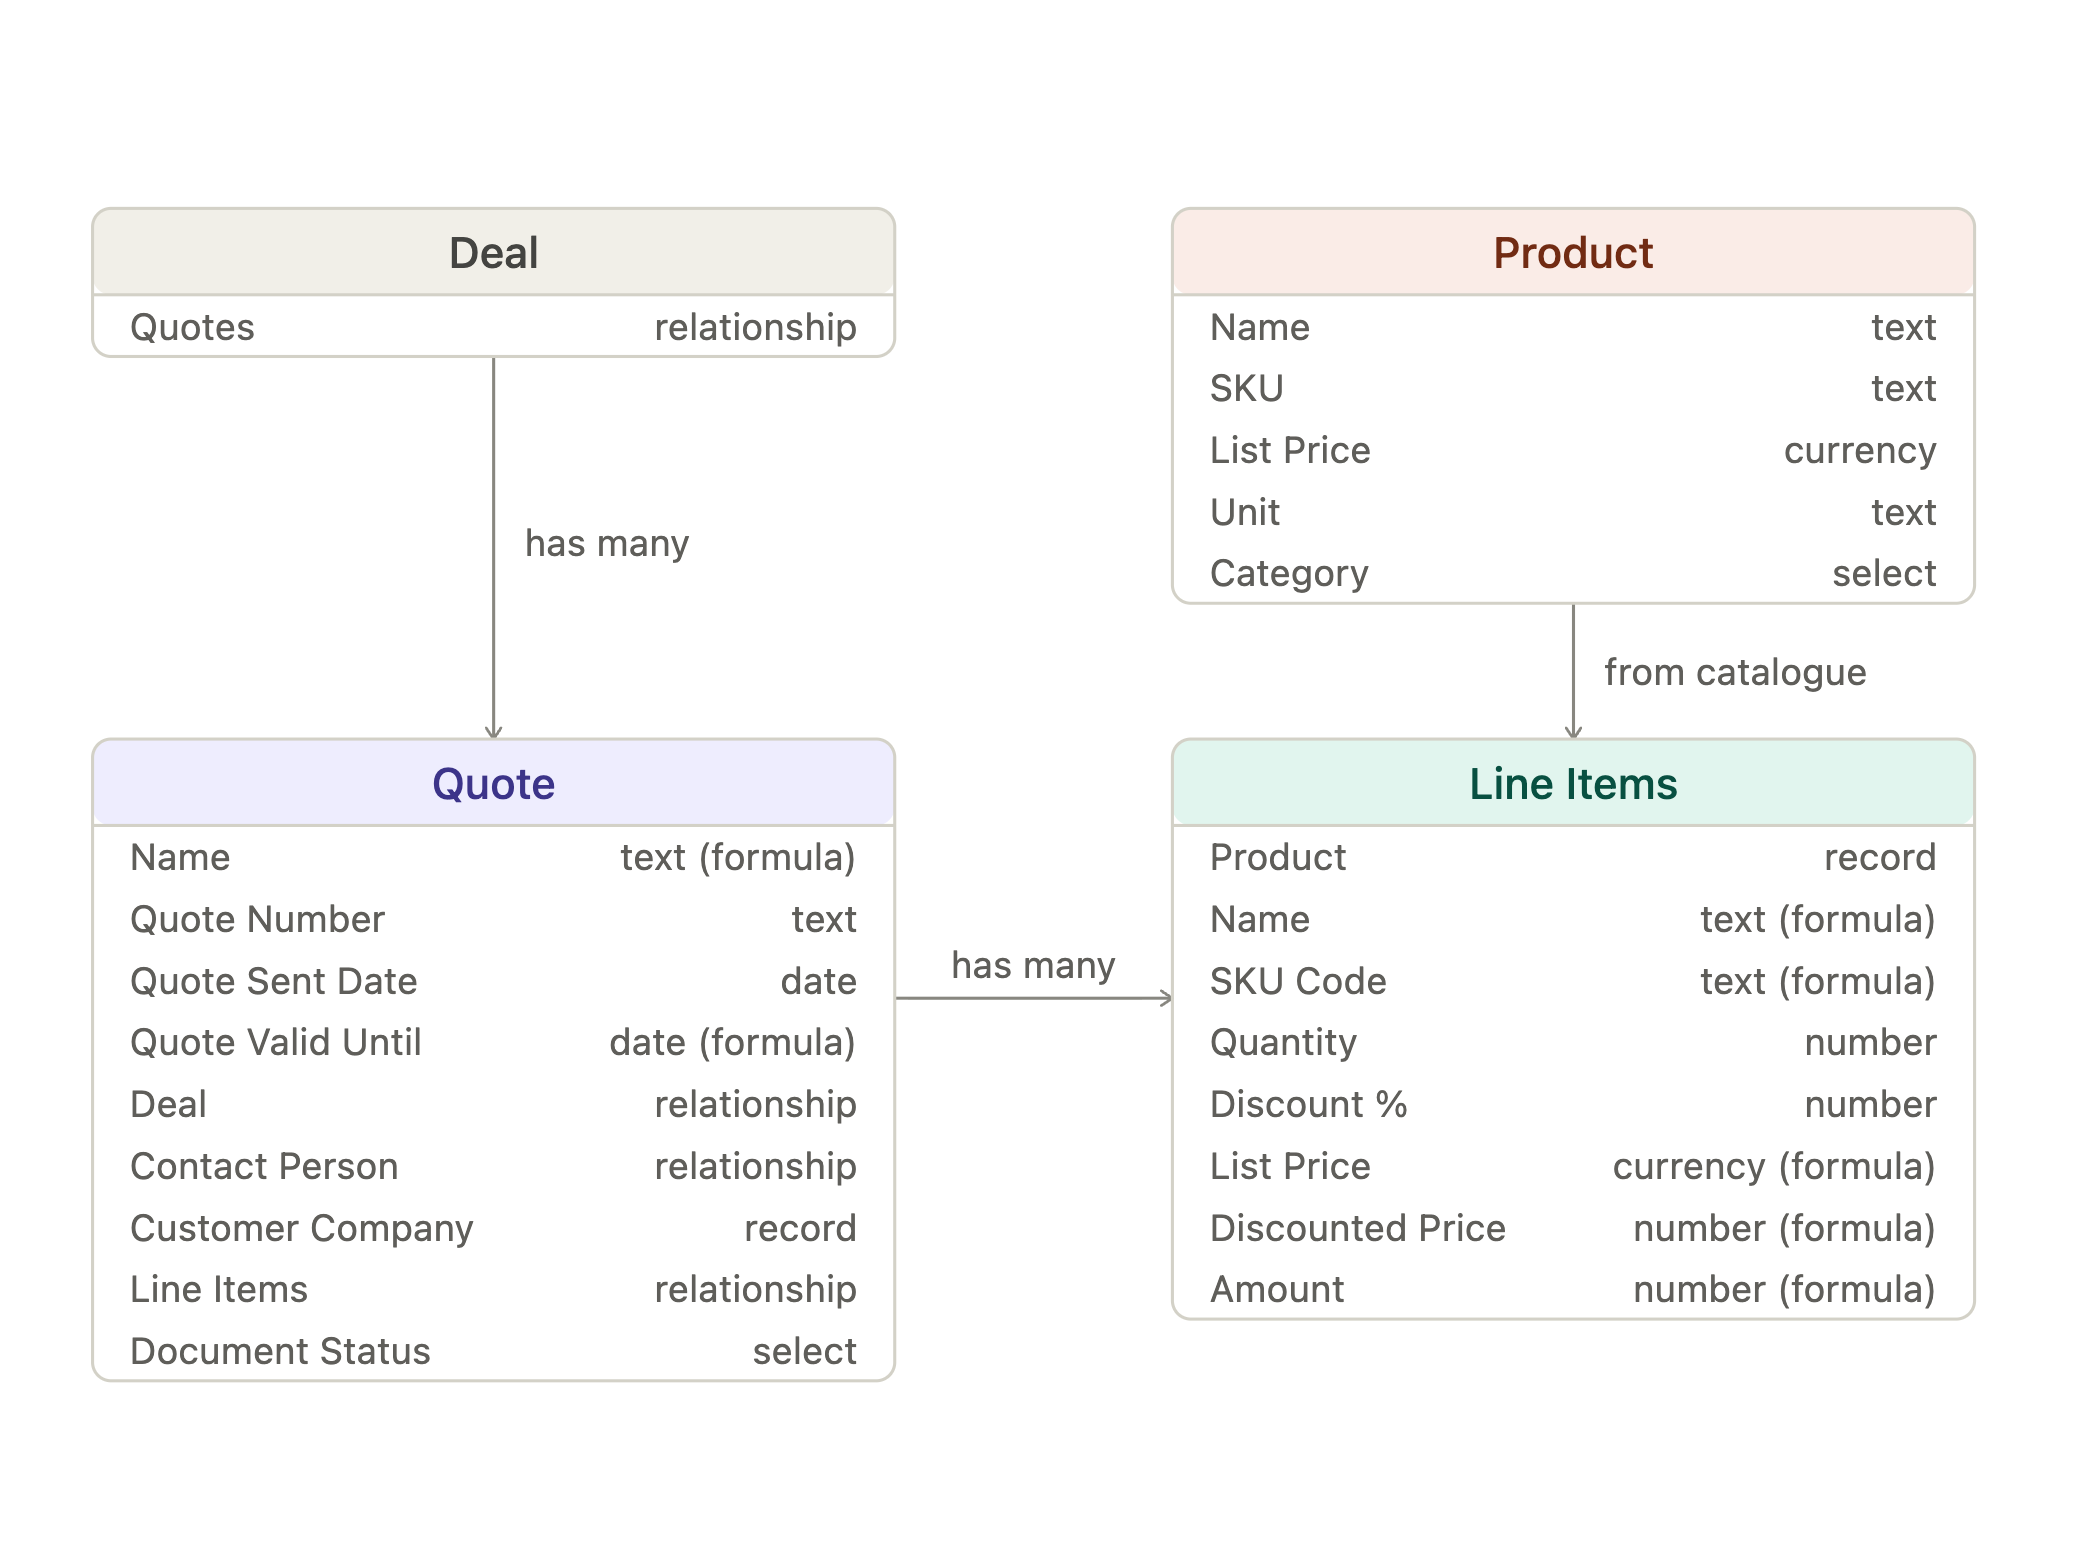
The approach that worked for me was to use 3x custom objects:
Quotes (the object the document is generated from)
Products (a product catalogue)
Line Items (pulls from product the catalogue; discounts can be applied by rep/user)
Each Deal can have many quotes. The full data model is outlined below (I can promise no AI was used in writing this post, but it is very handy for these types of graphics):
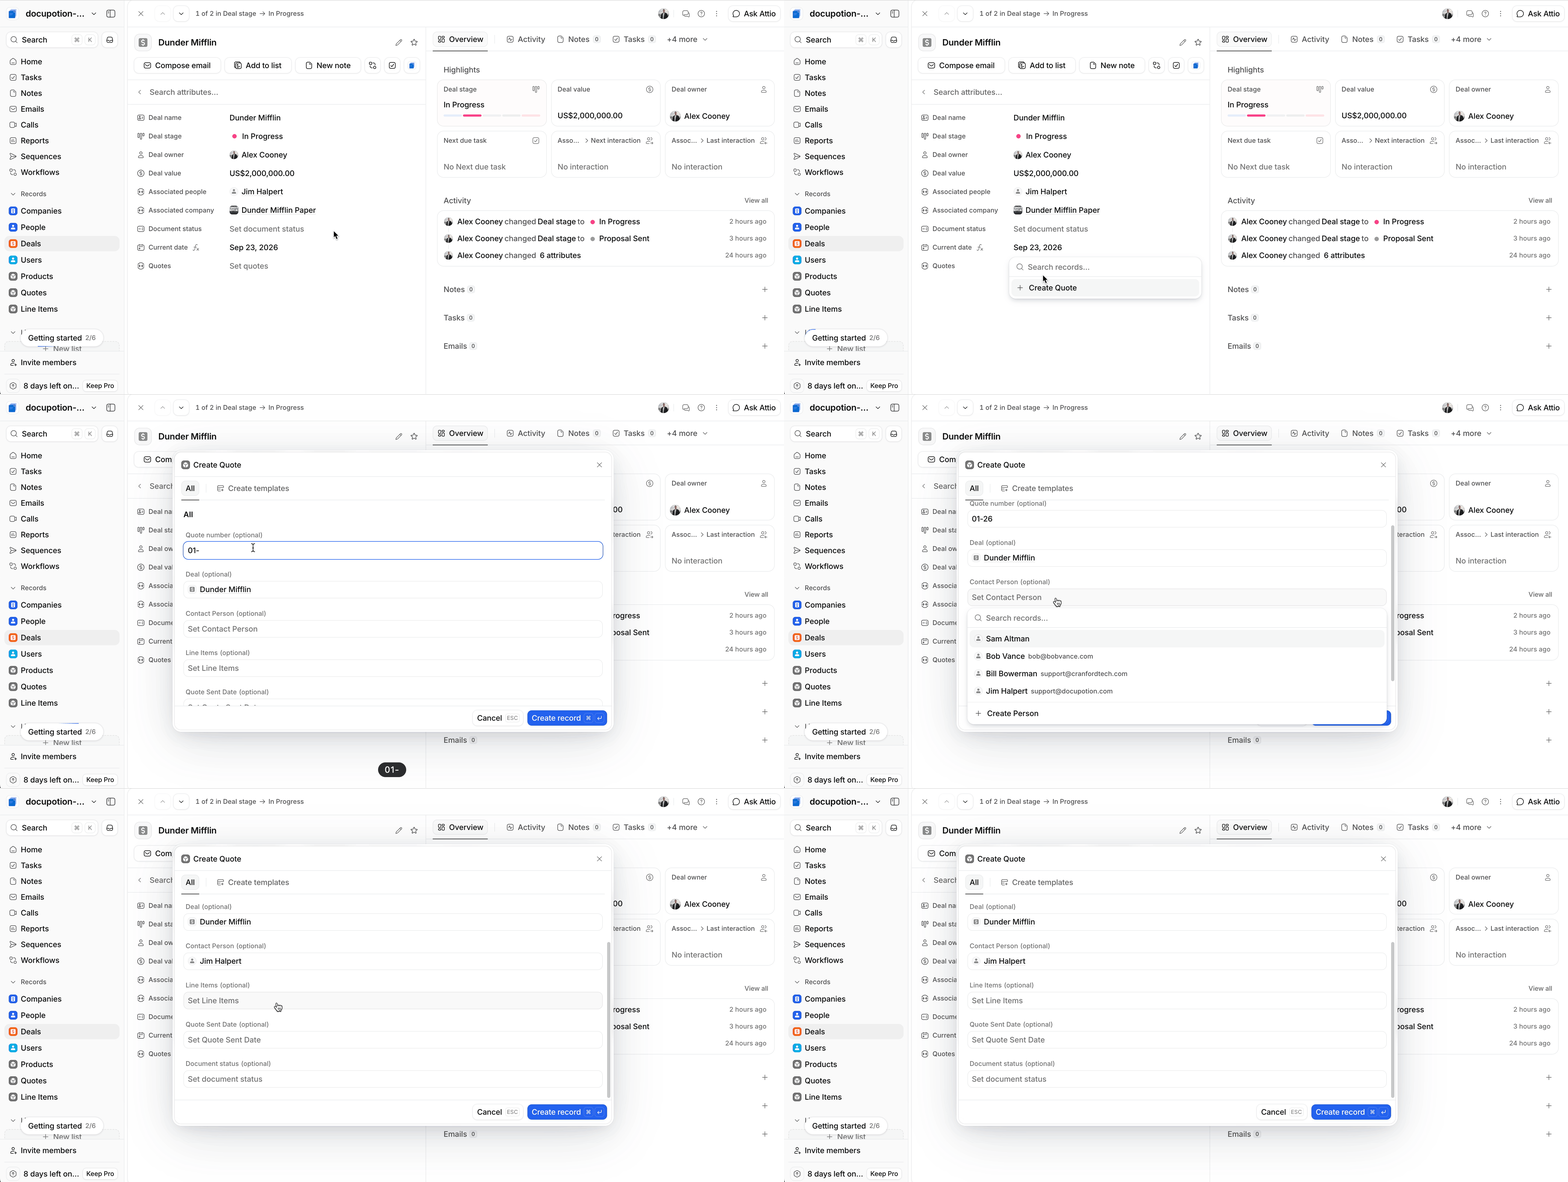
Create your quote record in Attio
In the Deal record, add a new Quote record. I recommend adding Line Items in the actual Quote record itself - see next section.
Creating Line Items from a Product Catalogue and adding to a Quote
You’ll notice from the data model graphic that much of the Line Items data is automatically pulled in from Products via formulas. The idea here is that there’s a product catalogue that the sales rep/user can use to build line items, but they can add discounts to the list price.
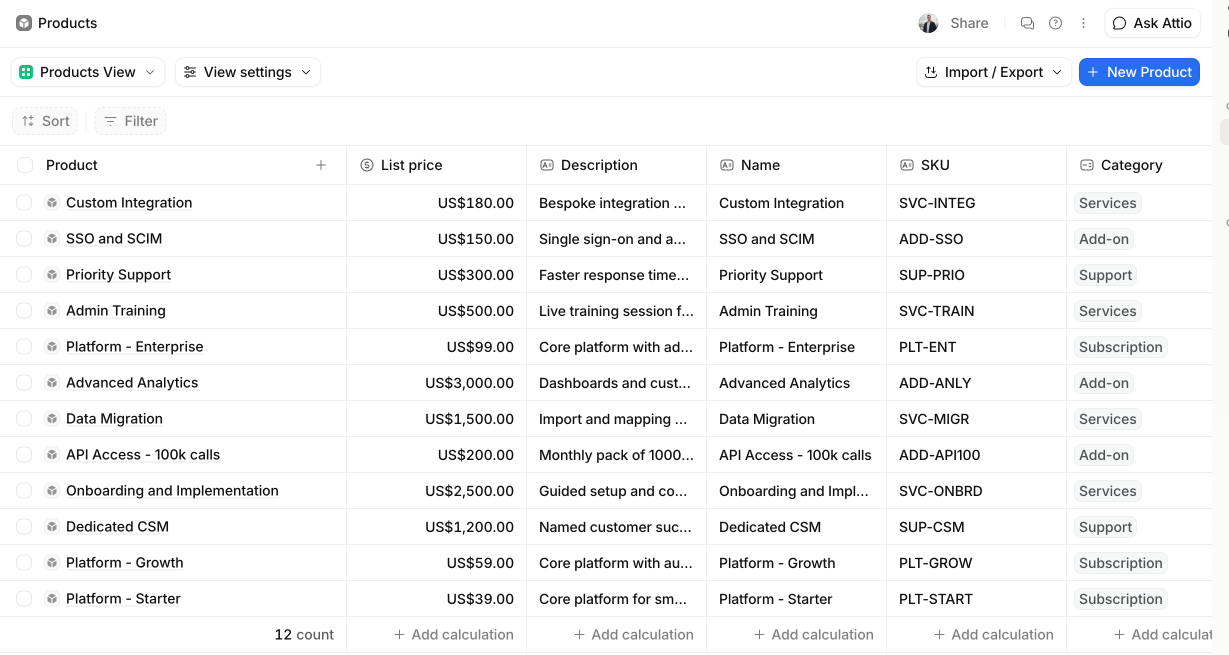
Here’s my product catalogue:
And here’s the user (also me) adding line items to my quote that pull from the product catalogue.
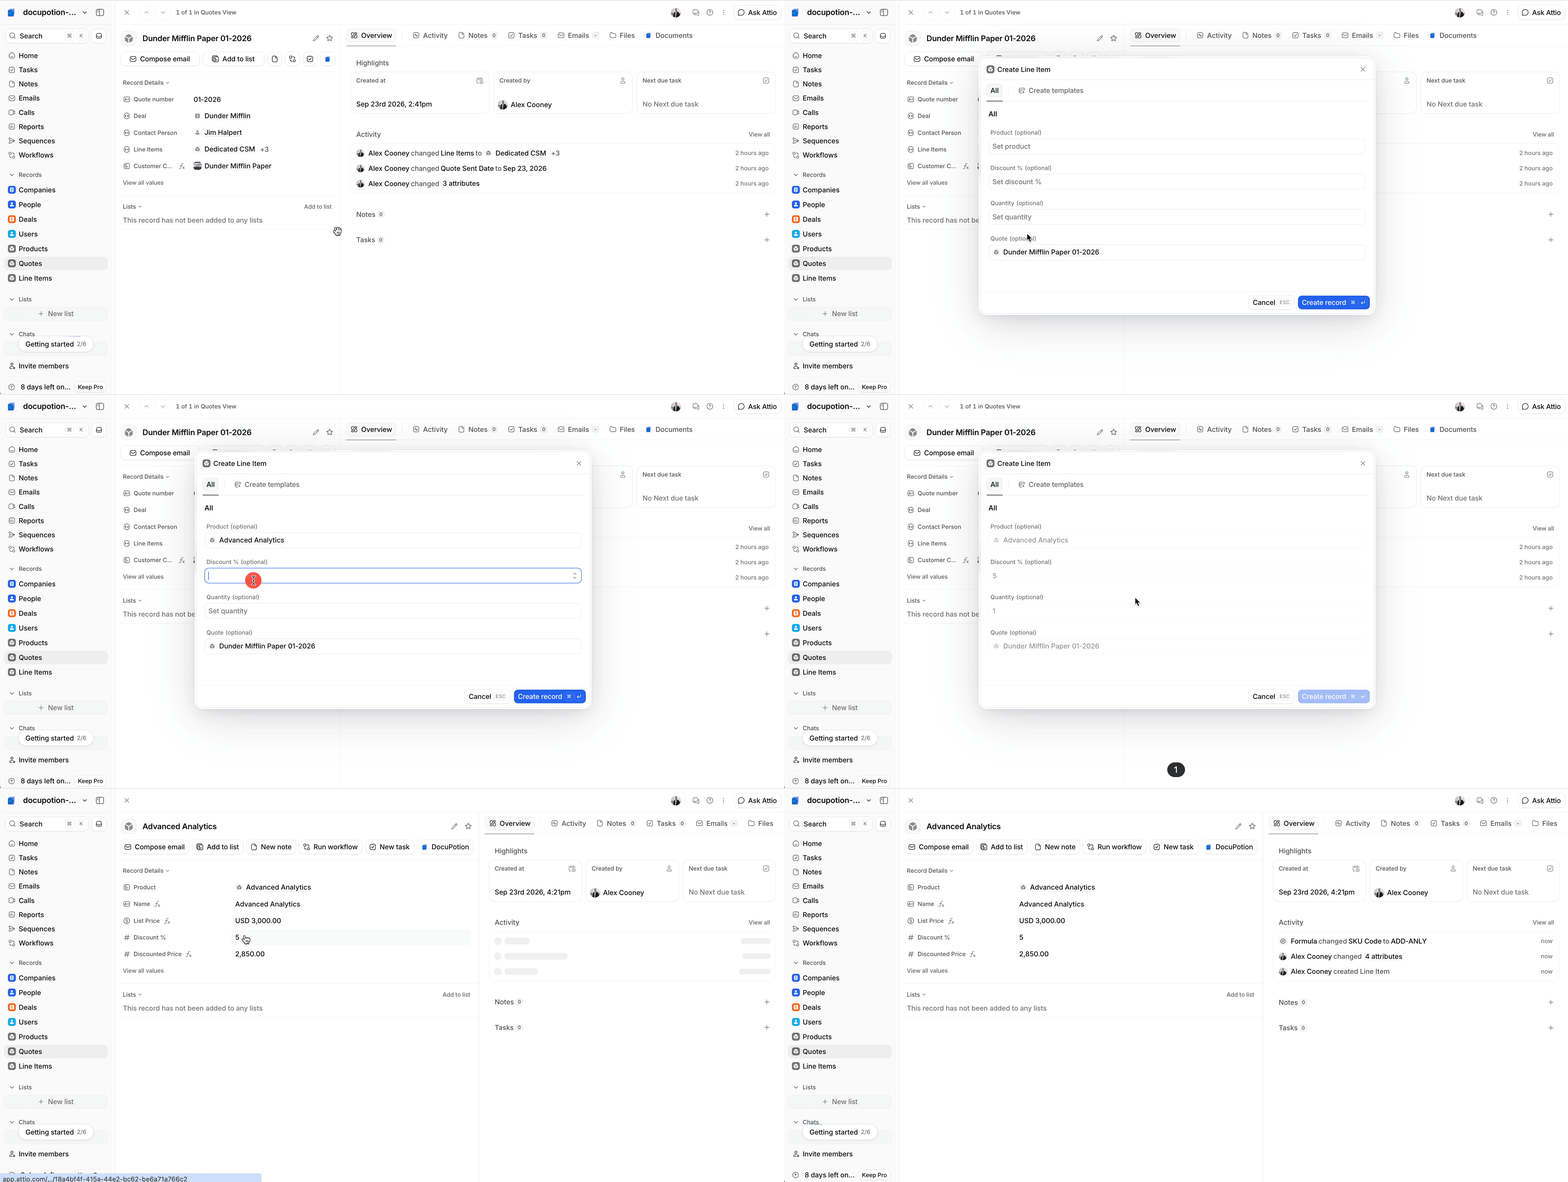
The Line Item name gets automatically populated from the Product, while the discounted price (which is what shows up on the quote) gets calculated based on the catalogue list price and the discount the user applies.
One thing I don’t love about this part: When the user is adding line items to the quote, all other line items that have been created appear in the dropdown. This isn’t ideal. If anyone has any recommendations on this do let me know!
Building a quote template + automation
This is the part where you’ll need a DocuPotion account.
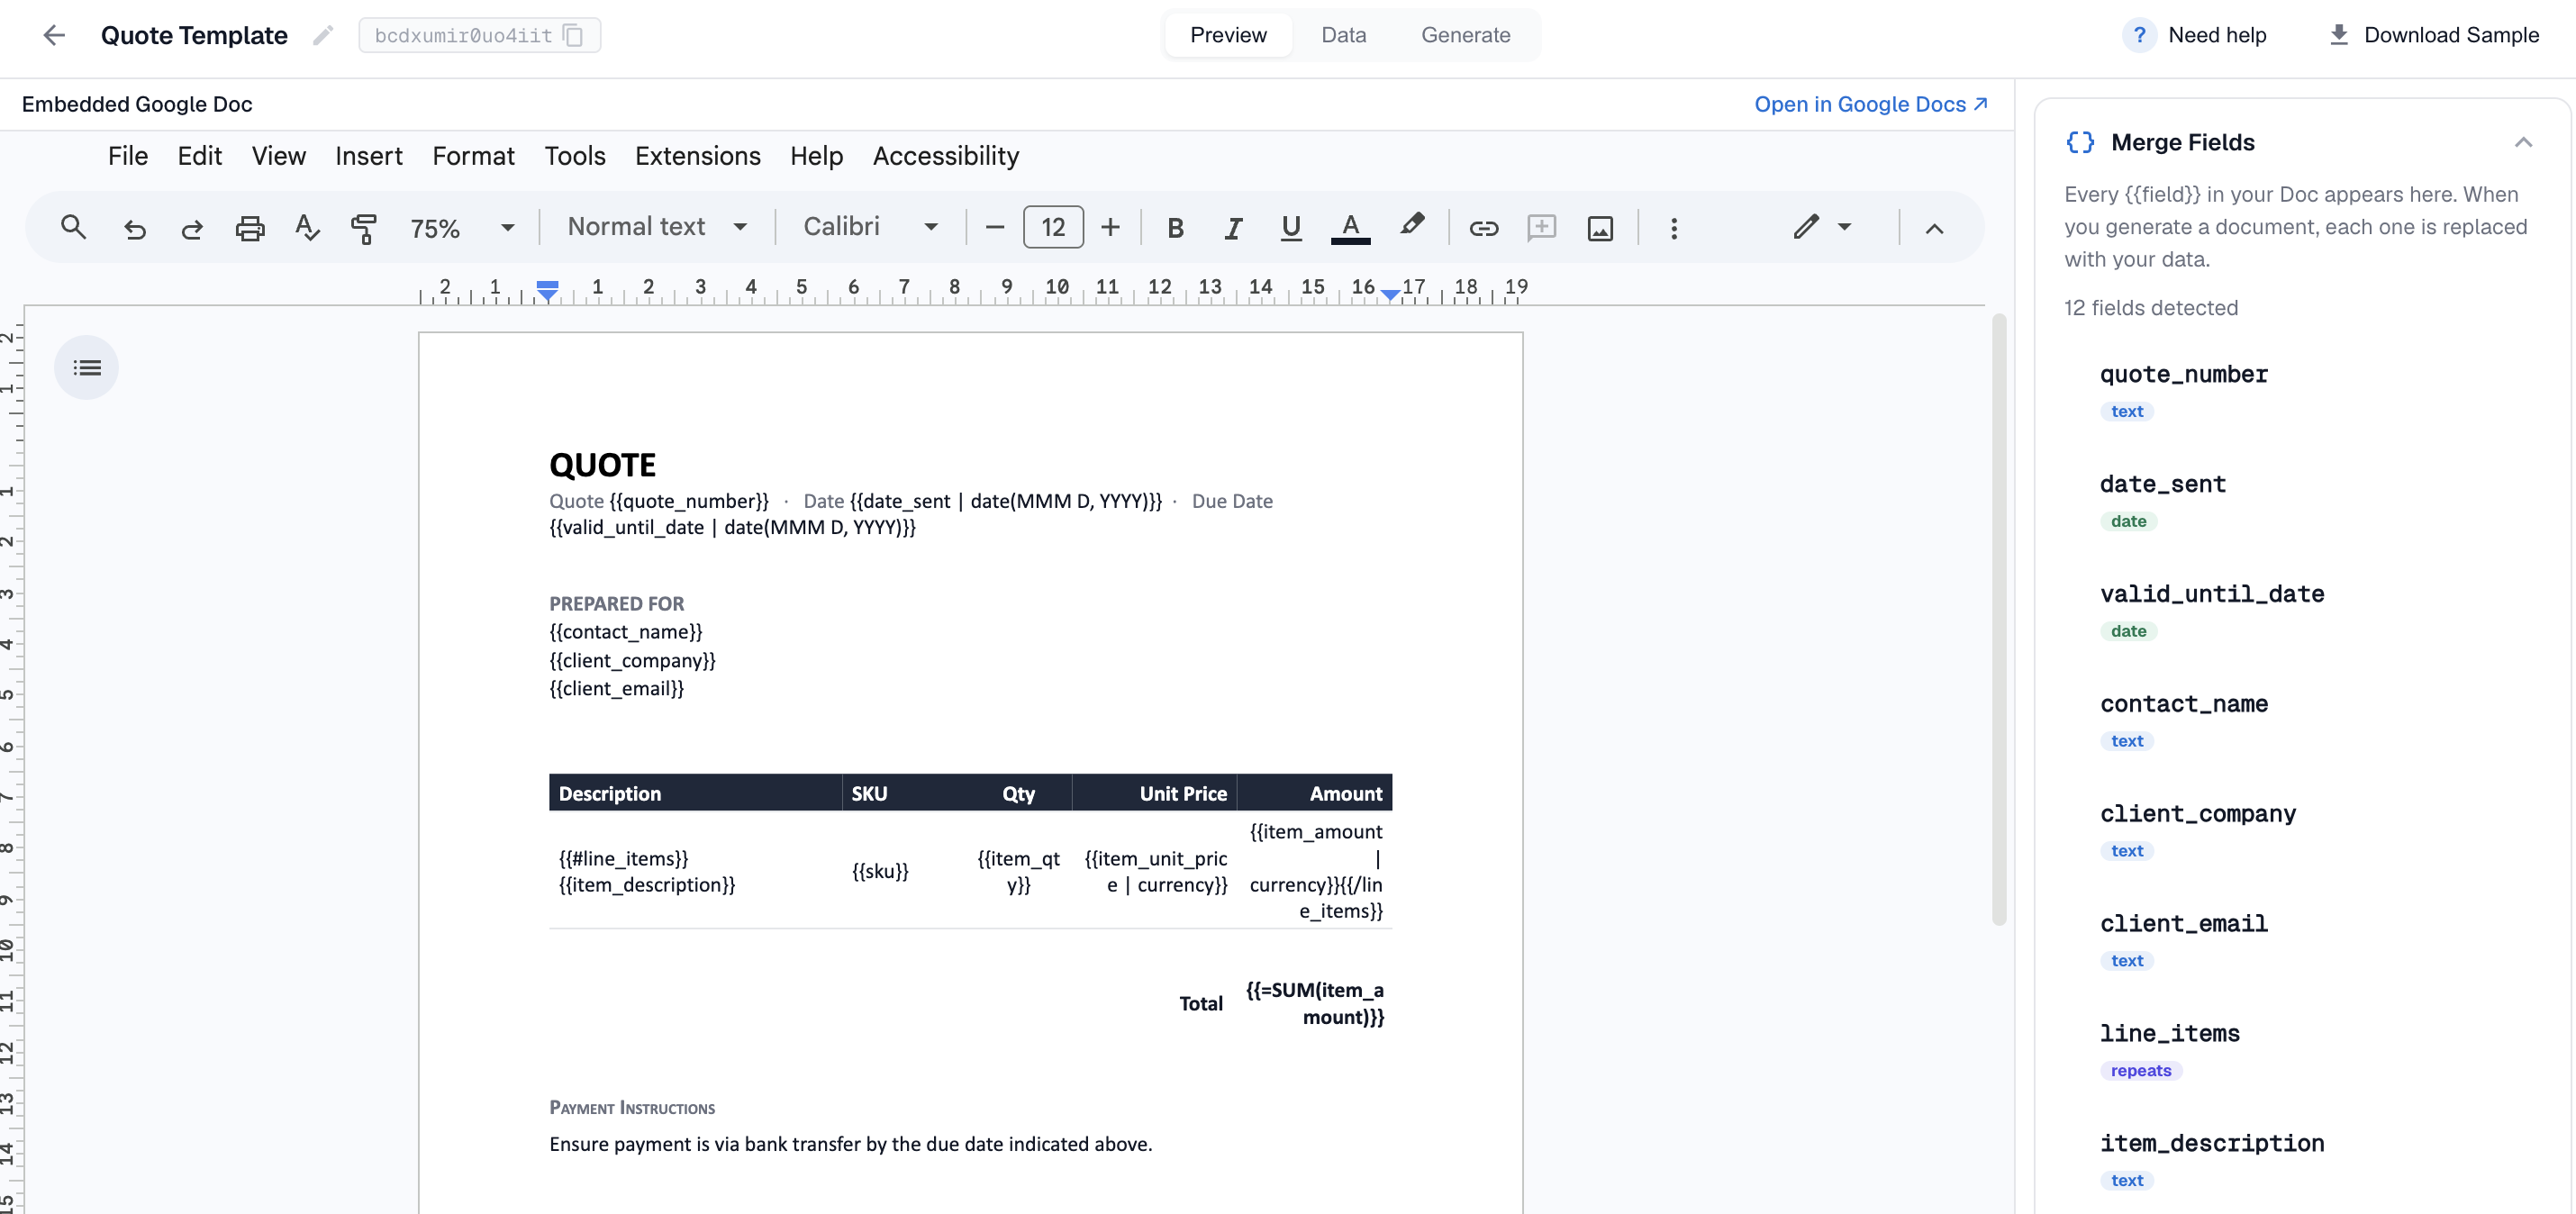
DocuPotion allows you to build reusable templates on Google Docs. So simply upload a quote Doc to your Google Drive (or you can ask ChatGPT to build one if you don’t have one to hand) and load into your DocuPotion editor. You can add {{merge_fields}} to your Doc - these will be replaced by Attio data when you start generating later.
Here’s what I ended up with:
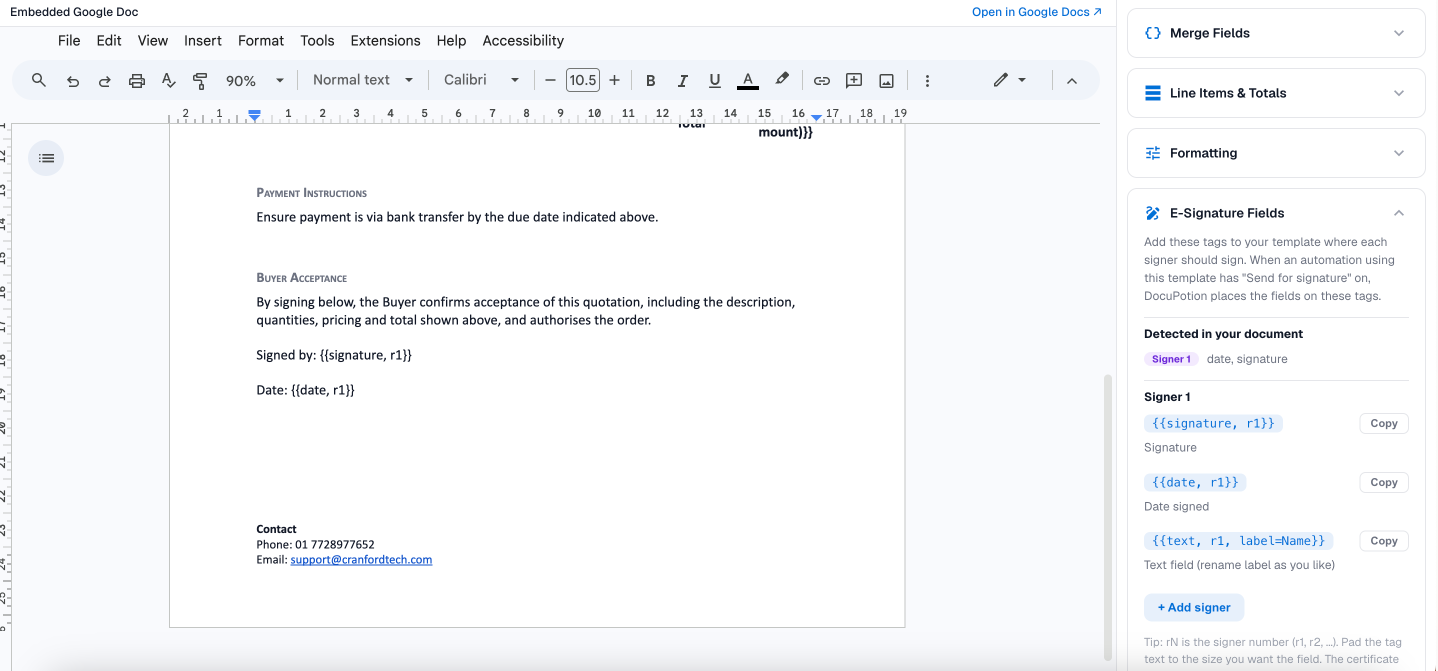
And the e-signature fields:
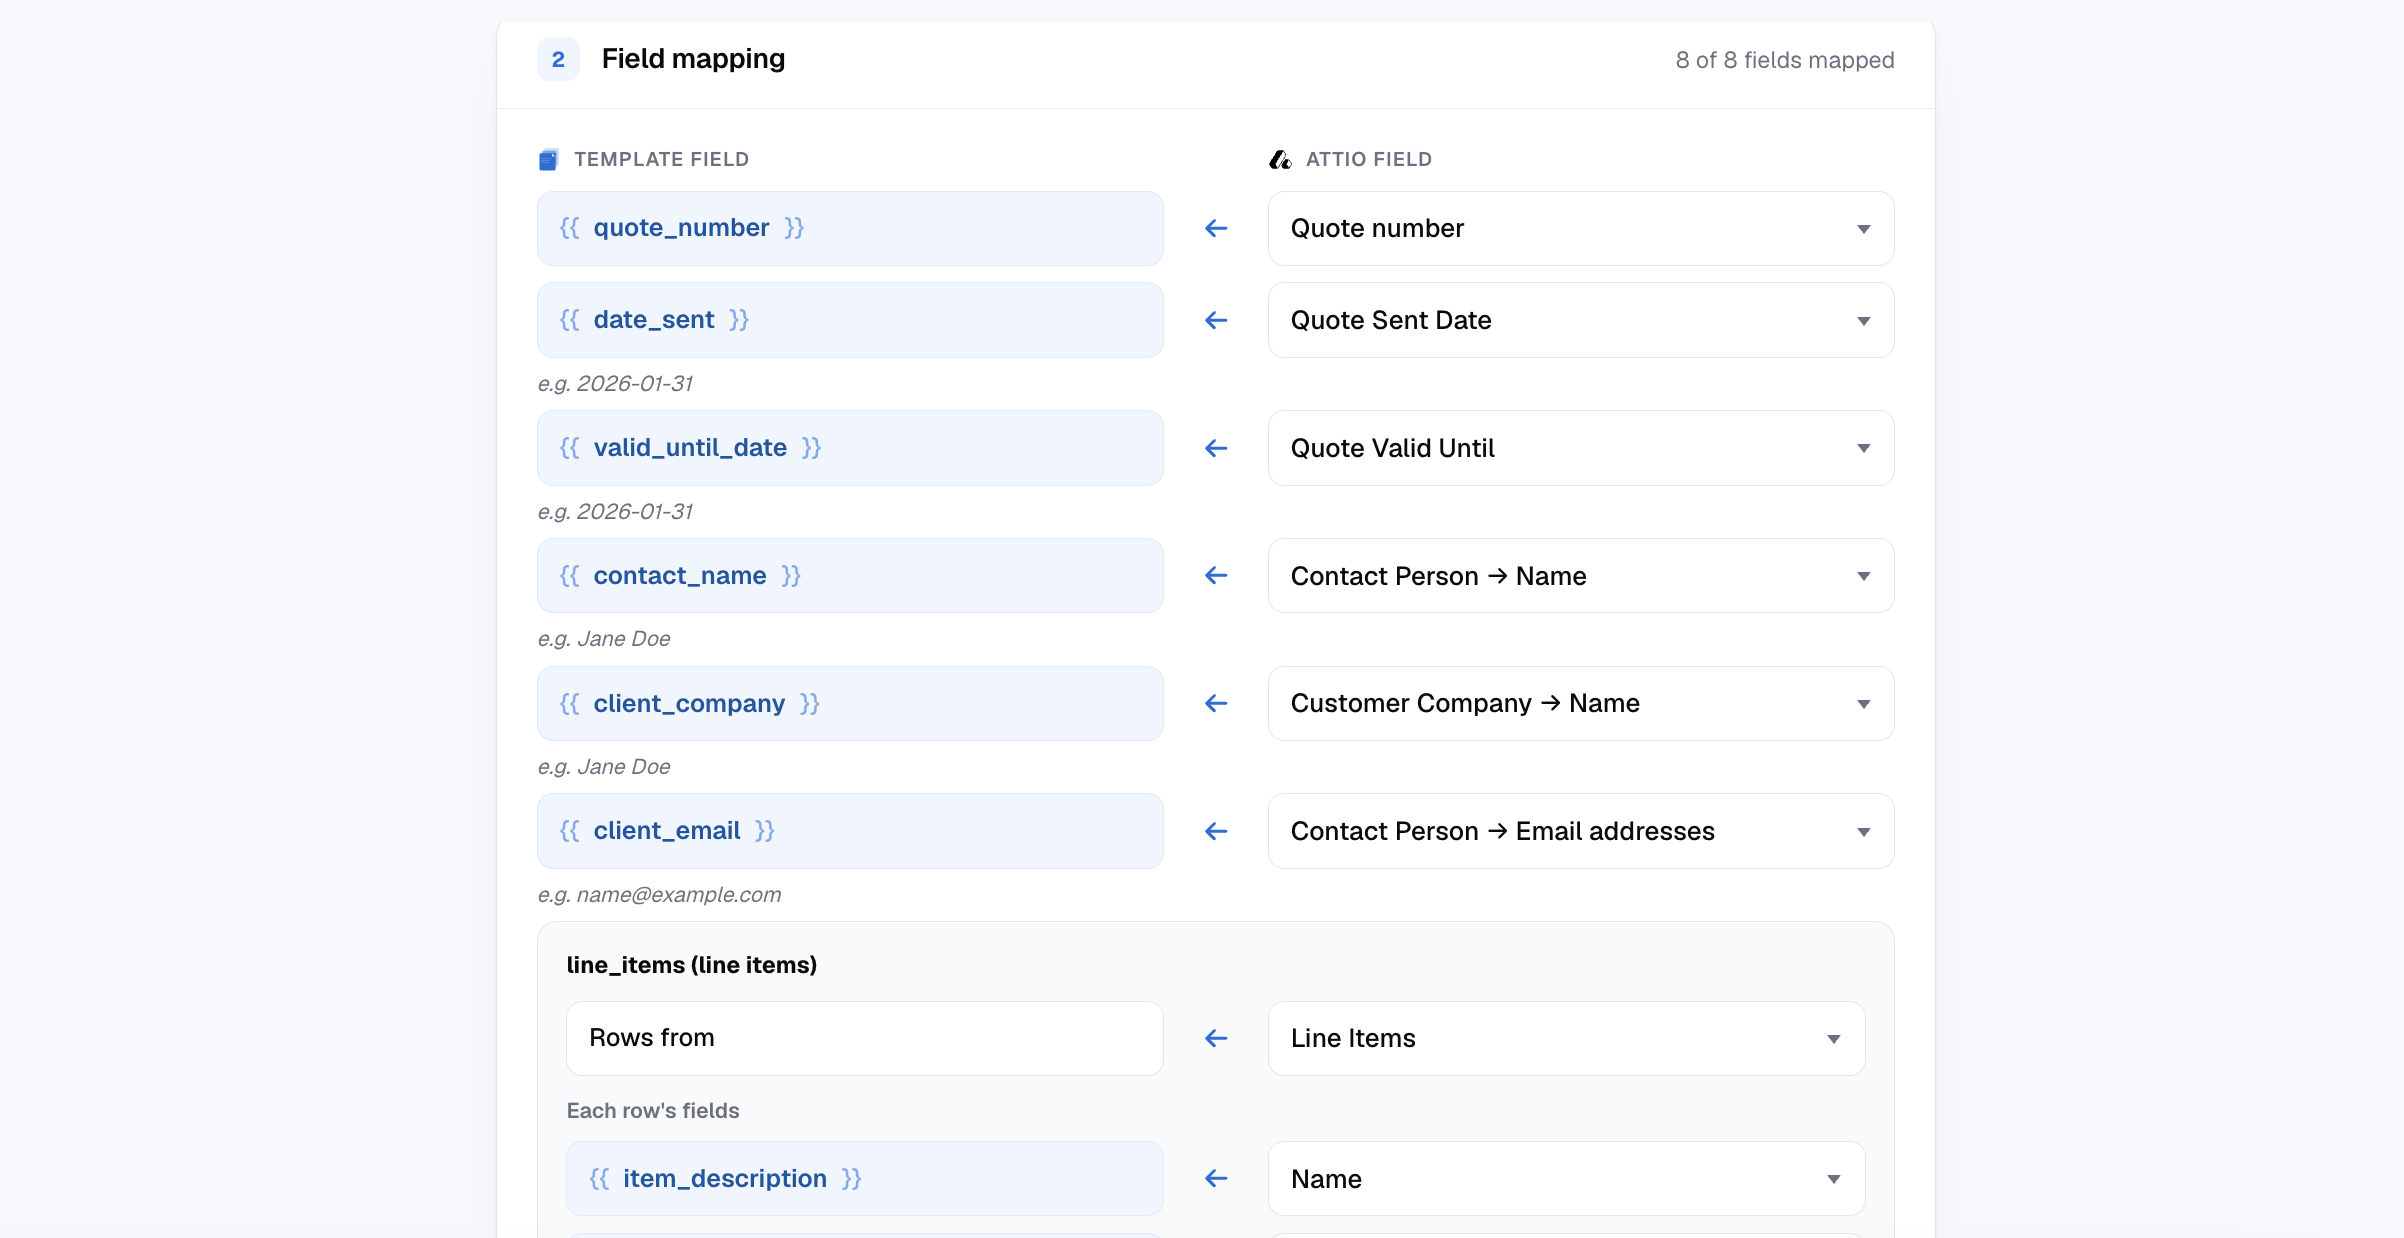
Once you’ve built a template, you’ll need to add it to a DocuPotion - Attio Automation. When you’re building an Automation in DocuPotion, you can map {{merge_fields}} in a template to Attio record data:
This is also where you’ll specify if you want your document sent to someone for e-signature. In our example, we’re going to do this:
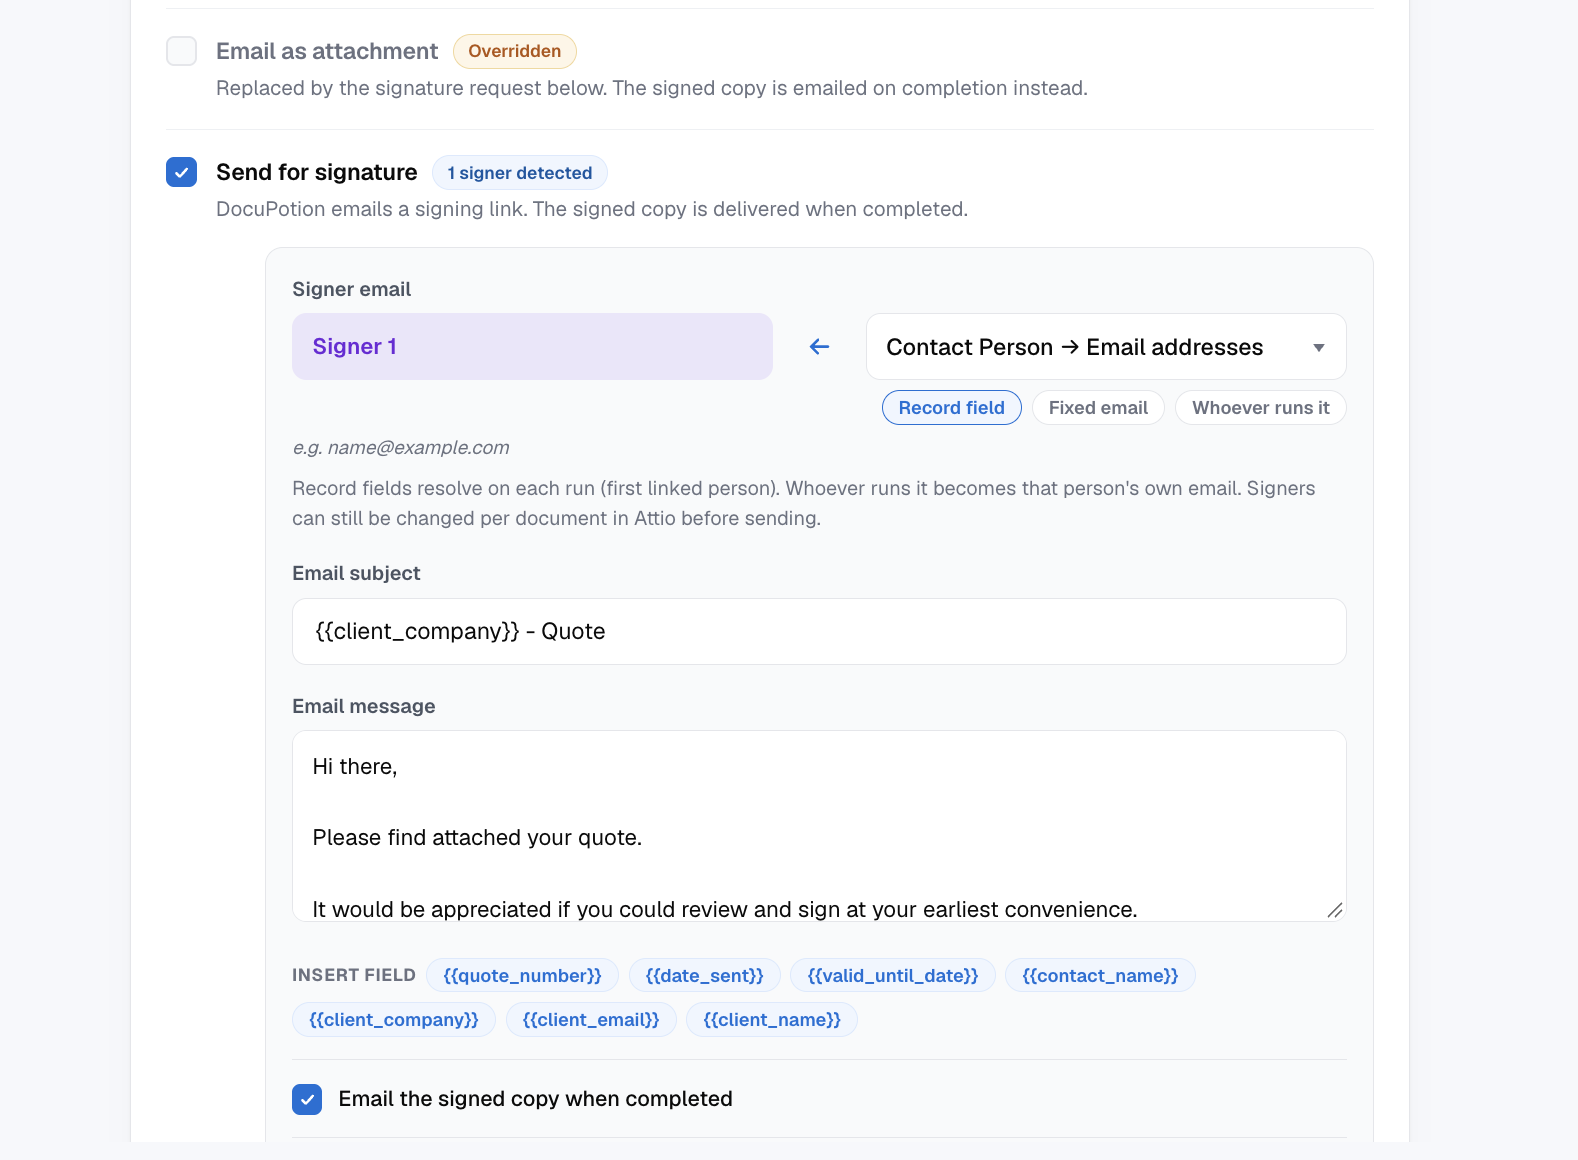
Note: If you don’t want to send your document for e-signature, simply leave this section unchecked and don’t include any e-signature fields in your template. When you run your automation in Attio (see next section), the output PDF document will simply be uploaded to the Files section of the record it’s generated from (and optionally saved down to your Google Drive).
Generating the quote from Attio and sending for signing
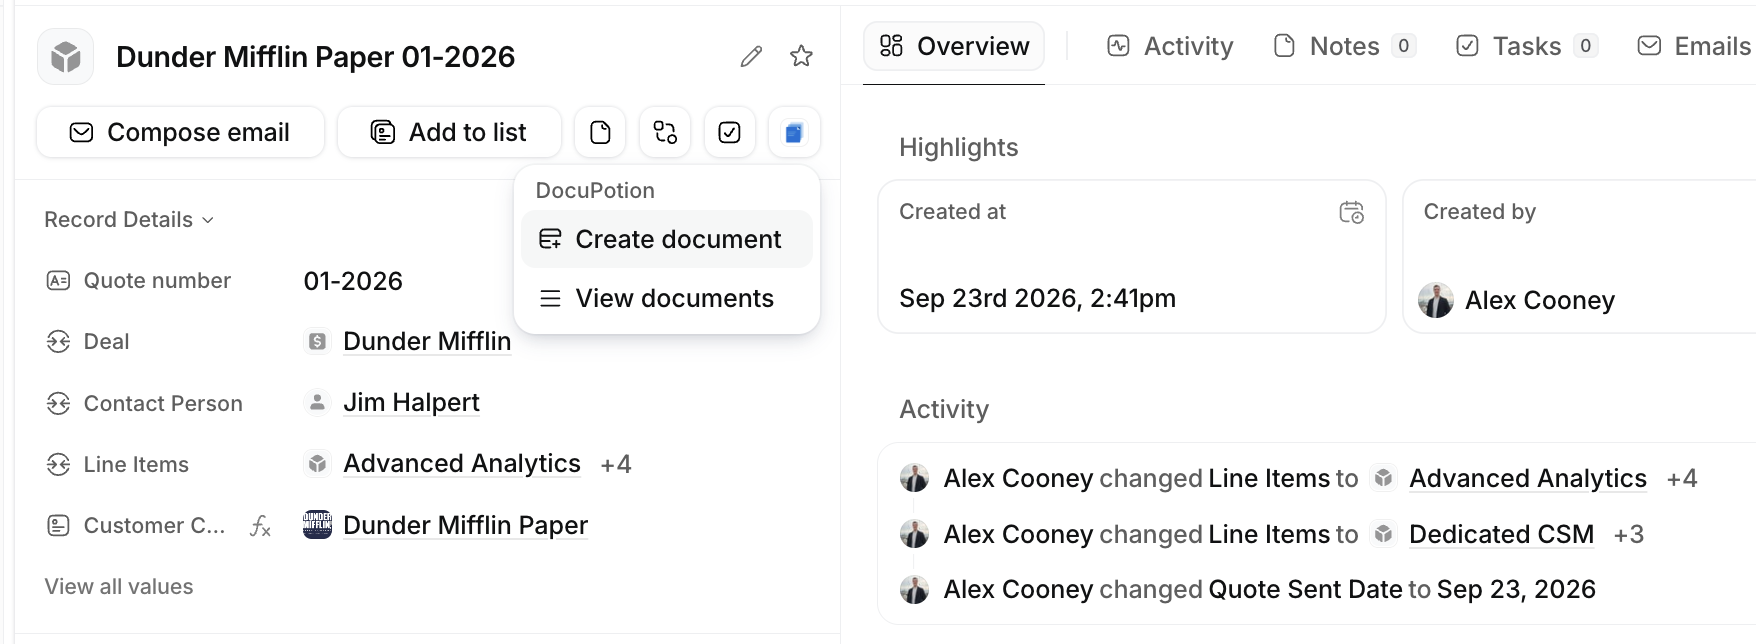
Once you’ve installed the DocuPotion Attio app, you’ll be able to trigger automations from a record. In our case, we’re going to trigger our Quote automation from our Quote custom object.
Click on the DocuPotion icon → Create document and pick the relevant automation:
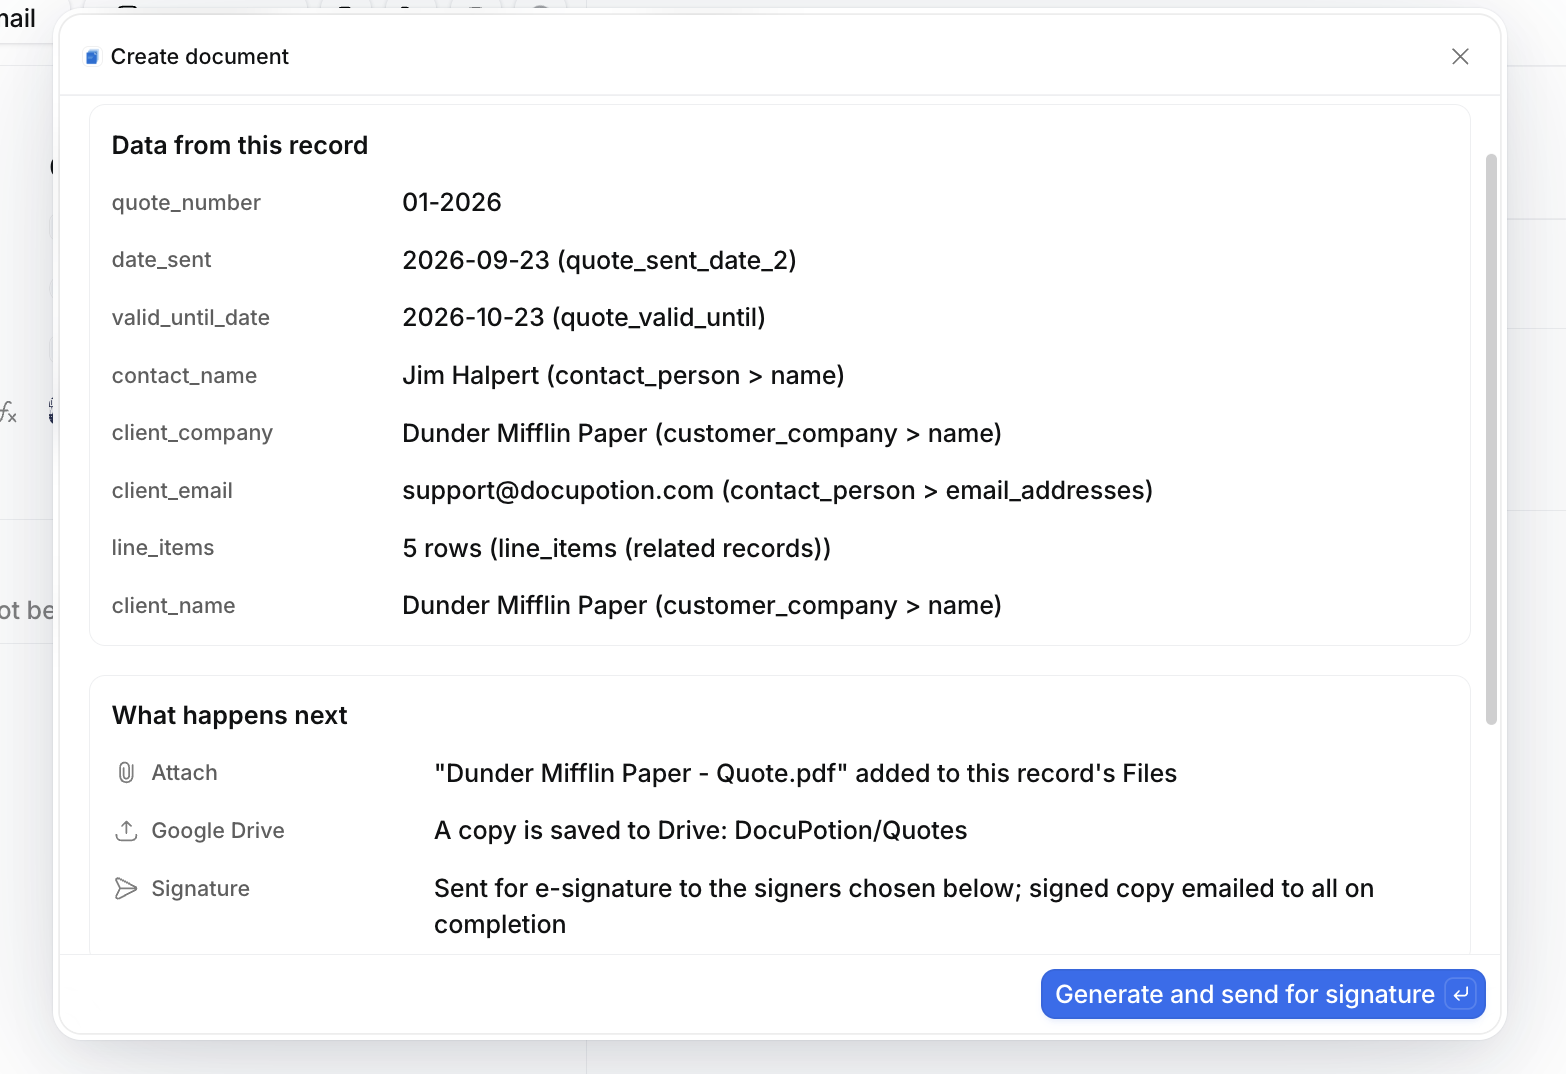
You’ll then be shown what Attio data will be merged into the template (we defined this in the automation):
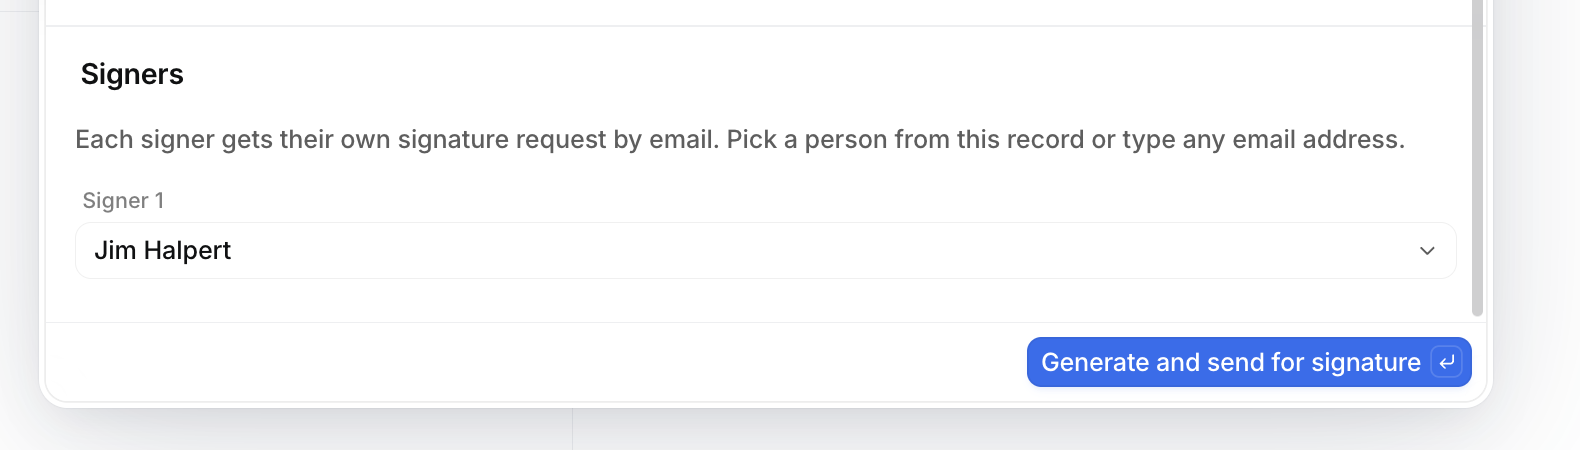
You can also see who the document will be sent to for signing. You can override this with a manual input or pick another person:
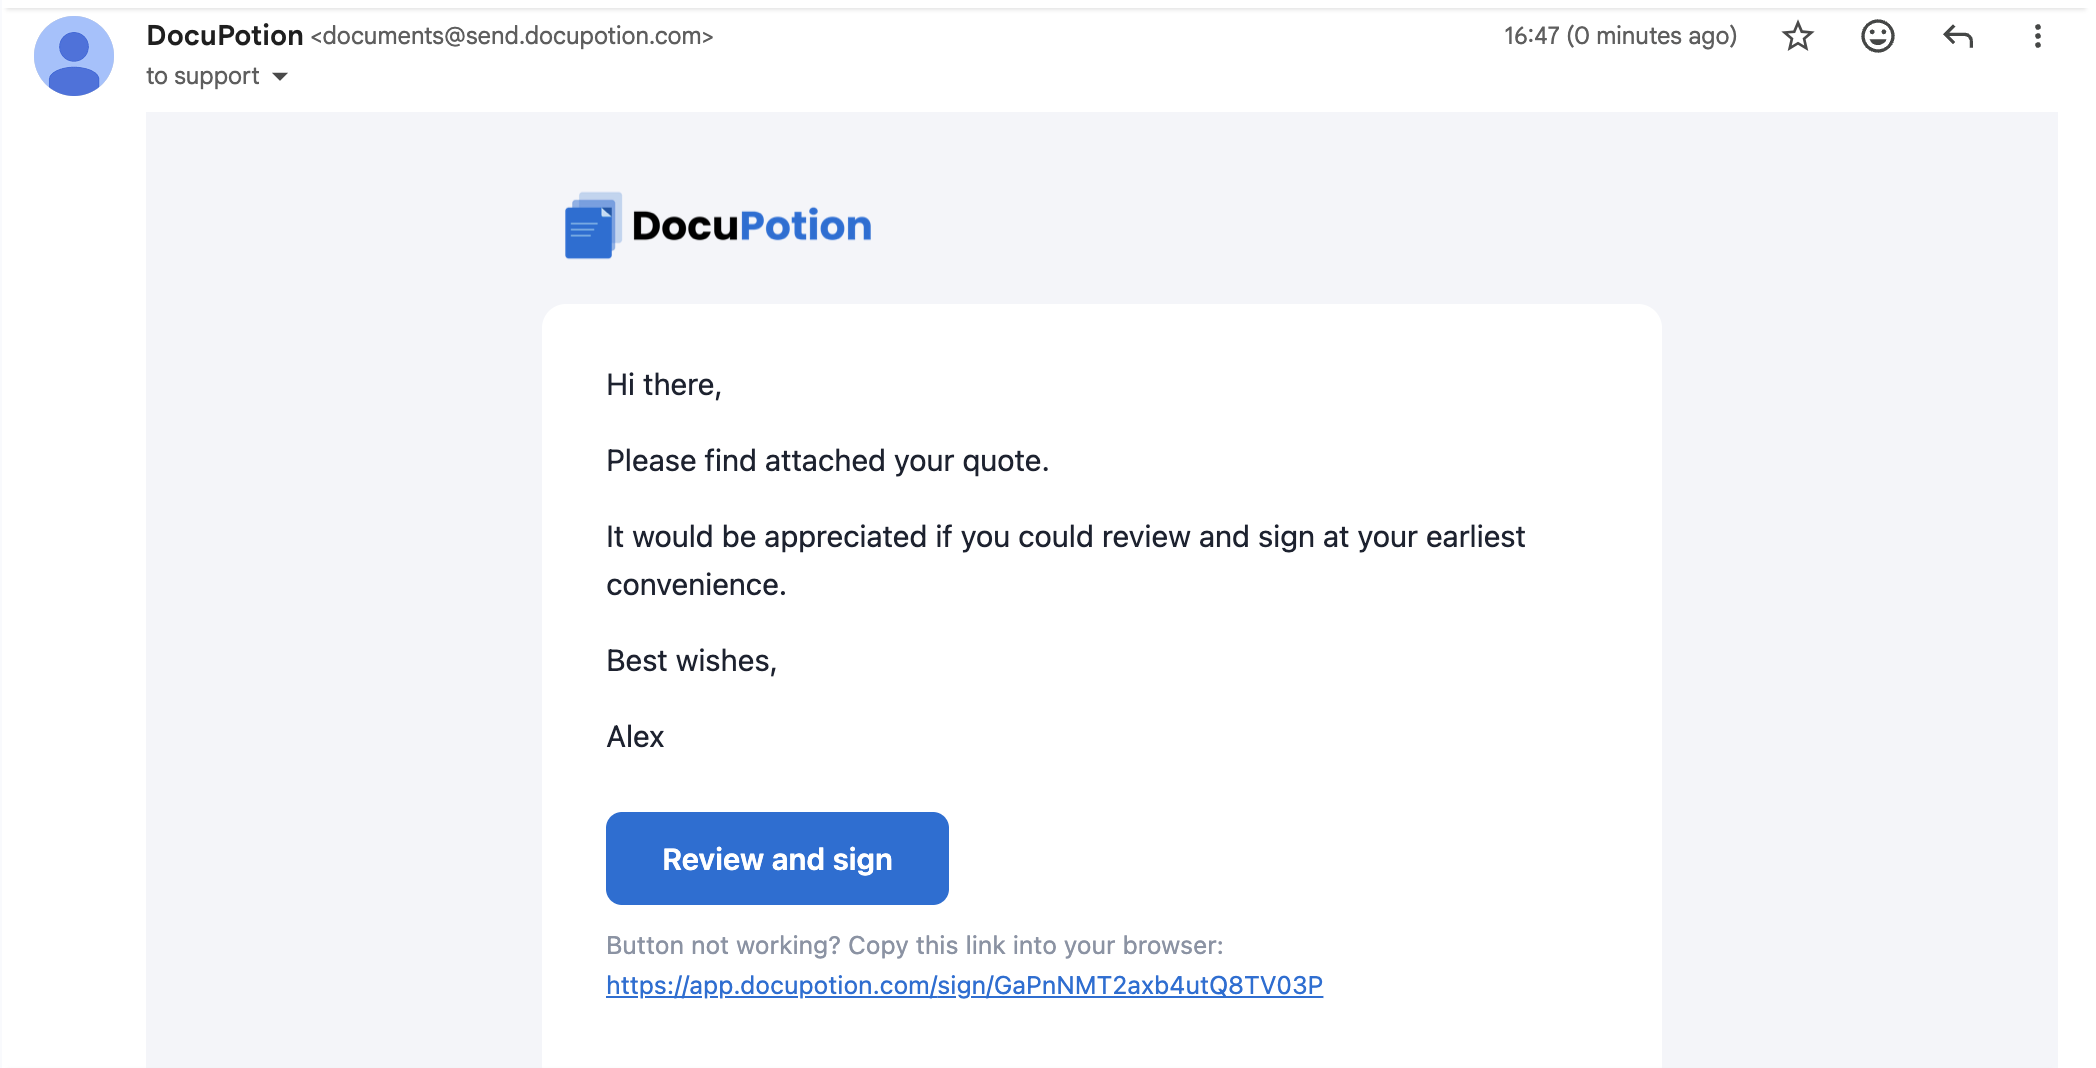
Once you click the Generate and send for signature button, the document will be sent to the signer. They’ll get an email requesting a signature a few moments after the generation starts:
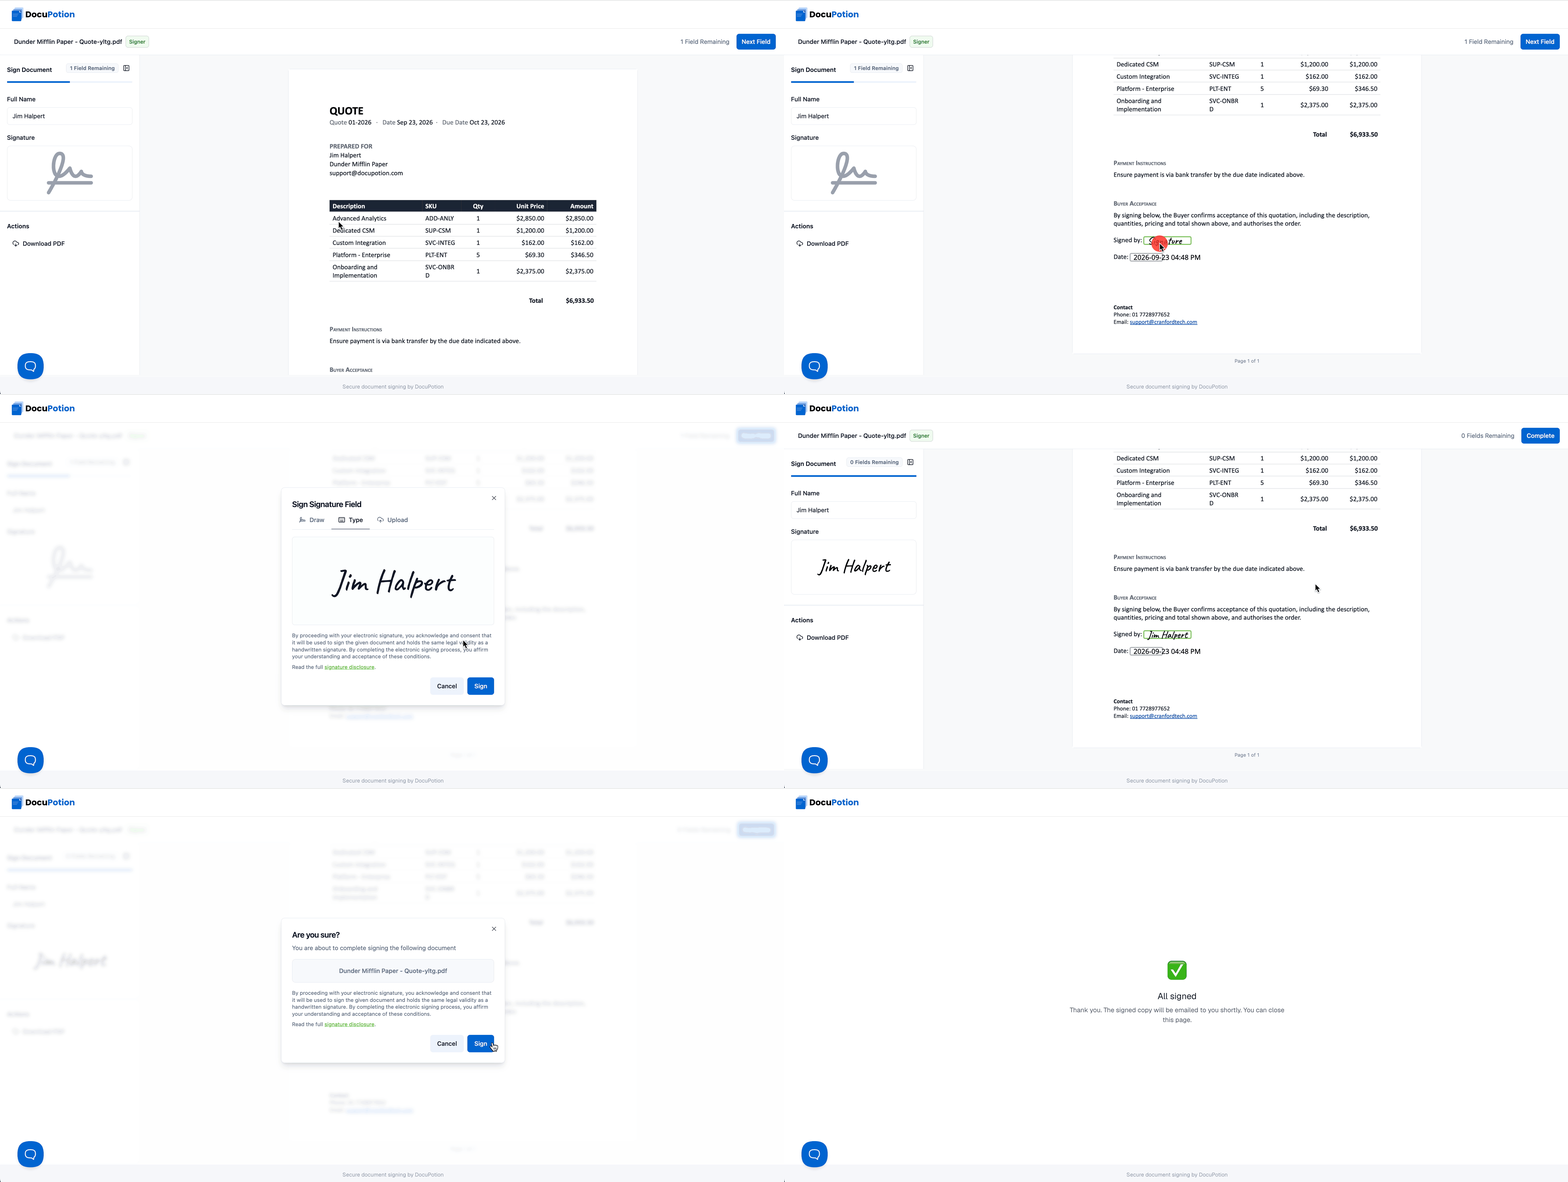
They can then sign the document, much like you would with DocuSign or similar tools.
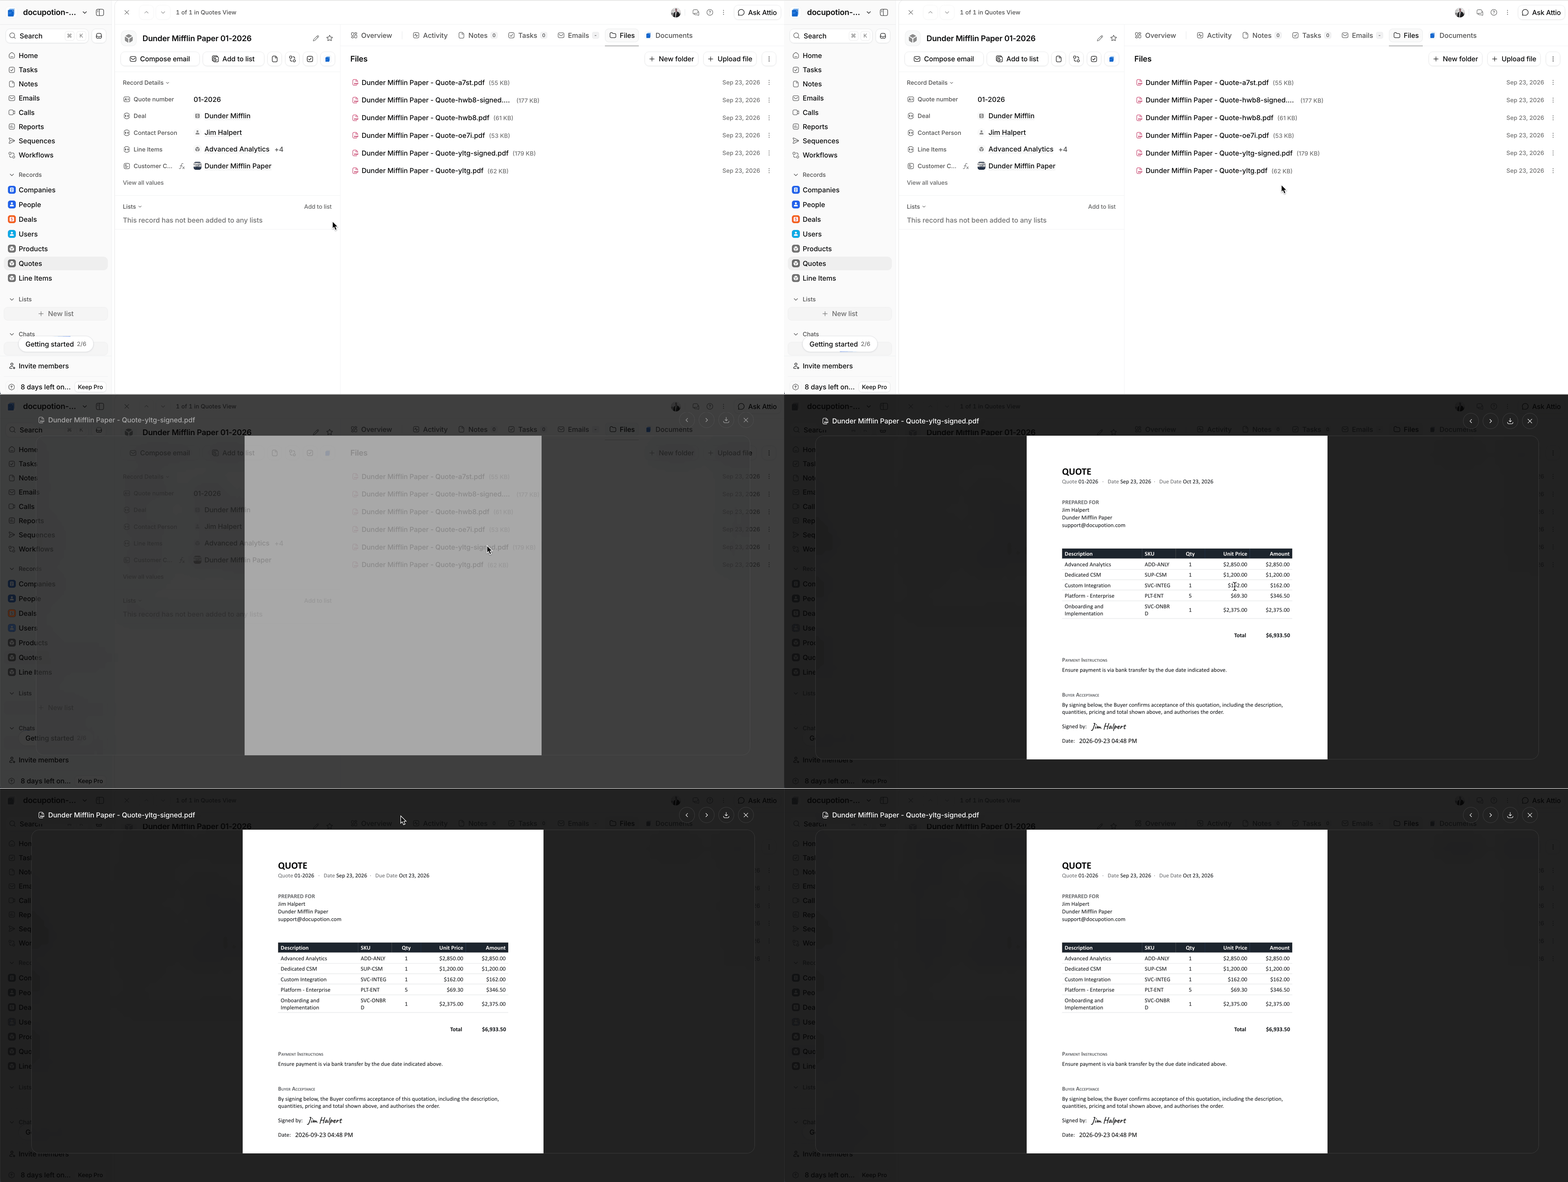
An unsigned AND signed version of the document is automatically uploaded to the Files section of your Attio record.
Automatically updating the status of a Deal when a document is signed
The DocuPotion app adds an attribute called Document Status to any object an automation is created on. This status changes from:
Awaiting Signature → Signed
whenever a document is signed by the signer(s).
This means you can run Attio workflows whenever a quote gets signed. In the workflow below, we’re updating the stage of the Deal associated with the Quote to Won whenever a document is signed:
Tracking the status of documents sent for signature
The DocuPotion app comes with a custom Documents tab (something that only became possible with the recent SDK update - thank you Attio team) that allows you to track the status of a document:
Hopefully all this is useful to some people! If you have any questions or feedback, do let me know.
Alex